
Table of Contents
- Introduction
- Why Replace the Reverse Gear on Your Harley Touring Bike?
- Tools and Preparations Required
- Step-by-Step Guide to Harley Reverse Gear Replacement
- Eagleking Harley Touring Electric Reverse Kit: A Premium Choice
- Post-Installation Checklist and Maintenance Tips
- Common Mistakes to Avoid During Installation
- Summary Table: Key Takeaways
Introduction
Installing or replacing a reverse gear on your Harley-Davidson Touring motorcycle can drastically improve maneuverability and rider confidence, especially in tight spaces or uphill parking situations. This guide offers a comprehensive, step-by-step tutorial to help you replace your Harley’s reverse gear with ease. Whether you’re upgrading for better performance or replacing a worn-out part, this article is your go-to resource.
Why Replace the Reverse Gear on Your Harley Touring Bike?
A reverse gear system is essential for large, heavyweight motorcycles like Harley Touring models. Here are several reasons why replacing or upgrading is a wise decision:
- Improved Maneuverability: Backing up becomes effortless in tight parking spaces or on inclined surfaces.
- Safety: Reduces the risk of dropping the bike while reversing manually.
- Enhanced Resale Value: A bike with a working reverse gear is more attractive to buyers.
- Wear and Tear: If your current reverse gear is damaged or inefficient, replacing it ensures longevity.
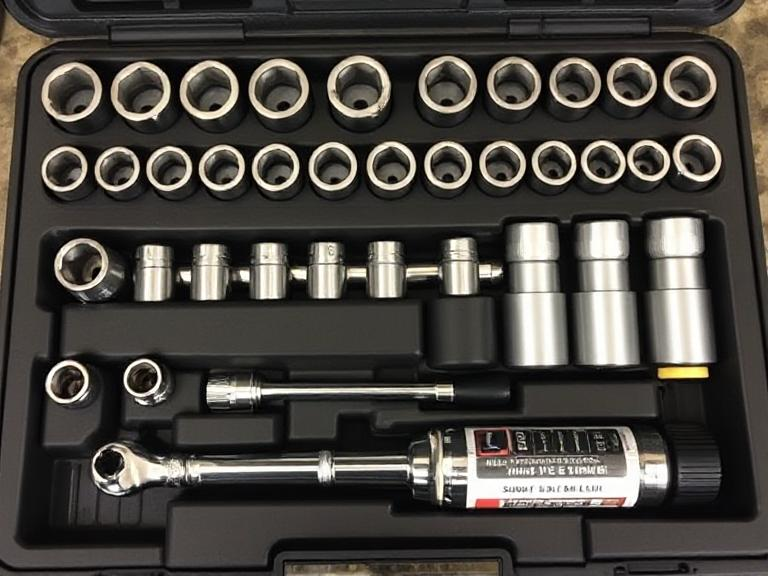
Tools and Preparations Required
Before diving into the replacement process, ensure you have all necessary tools and a clean working environment.
Required Tools
- Socket set (metric and SAE)
- Torque wrench
- Allen wrenches
- Loctite threadlocker
- Motorcycle lift or jack
- Service manual for your Harley model
Preparations
- Park the bike on a level surface and lift it securely.
- Disconnect the battery to avoid electrical shorts.
- Clean the workspace to prevent contamination of new parts.
Step-by-Step Guide to Harley Reverse Gear Replacement
Step 1: Remove the Seat and Side Panels
- Disconnect the battery.
- Use the appropriate socket or Allen wrench to remove bolts securing the seat and side panels.
Step 2: Access the Transmission Housing
- Remove the exhaust system if necessary to access the transmission case.
- Drain the transmission fluid completely.
- Remove the transmission cover using a torque wrench.
Step 3: Remove the Existing Reverse Gear (If Applicable)
- Take photos or mark gear alignment before disassembly.
- Gently remove the reverse gear mechanism with care to avoid damaging surrounding components.
Step 4: Install the Eagleking Electric Reverse Kit
- Align the CNC-machined 4140 chromoly steel gears precisely.
- Apply Loctite on screws and secure the kit per the installation guide.
- Ensure the gear lever and motor are mounted tightly.
Step 5: Wiring and Electrical Connections
- Connect the reverse kit to the battery and fuse box as per wiring diagram.
- Secure wiring away from hot components or moving parts.
Step 6: Test the Reverse Gear
- Reconnect the battery.
- Turn the ignition on and test the reverse function with the switch.
- Check for smooth engagement and disengagement.
Step 7: Reassemble Components
- Reinstall the transmission cover and exhaust system.
- Refill transmission fluid to the recommended level.
- Reattach side panels and seat.
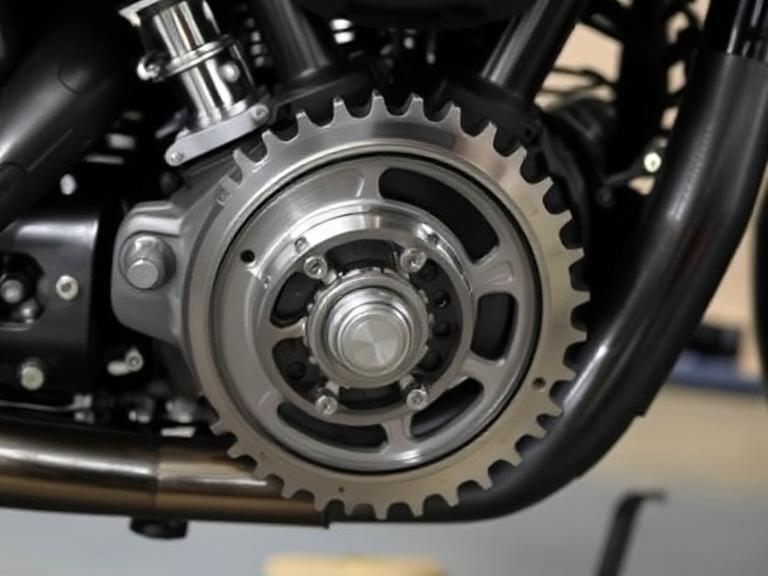
Eagleking Harley Touring Electric Reverse Kit: A Premium Choice
If you’re looking for a high-performance and reliable replacement, the Eagleking Electric Reverse Kit stands out for its engineering and user-centric features.
Key Features 🔧
- Precision Engineering: Aerospace-grade 4140 chromoly steel gears hardened to 58-60 HRC, tested for over 200,000+ cycles.
- Ergonomic Design: Compact size (41×36×32 cm), 40% lighter than traditional kits at just 3.5 kg.
- Smart Compatibility: Plug-and-play fit for Harley Touring models from 2014 to 2025, including Road Glide, Street Glide, and Ultra Limited.
Technical Specifications Table
| Parameter | Specification |
|---|---|
| Weight | 3.5 kg (7.7 lbs) |
| Dimensions | 41 × 36 × 32 cm |
| Material | CNC-machined 4140 chromoly steel |
| Surface Treatment | Black oxide corrosion-resistant |
| Torque Capacity | 650 Nm max |
| Temperature Range | -40°C to 150°C |
Post-Installation Checklist and Maintenance Tips
Checklist
- Electrical Check: Ensure wiring is secure and reverse motor activates properly.
- Mechanical Check: Confirm gear mesh is smooth and there are no loose bolts.
- Fluid Levels: Top off the transmission fluid and check for leaks.
Maintenance Tips
- Test the reverse gear monthly to prevent mechanical seizure.
- Reapply threadlocker annually or after extended rides.
- Clean connectors and apply dielectric grease to electrical contacts.
Common Mistakes to Avoid During Installation
- Skipping the battery disconnect: Risk of shorts and injury.
- Incorrect gear alignment: Leads to grinding or failed engagement.
- Over-torquing bolts: May strip threads or crack casings.
- Inadequate wiring protection: Can cause shorts or melted insulation.
Summary Table: Key Takeaways
| Aspect | Details |
|---|---|
| Reason for Replacement | Improved safety, maneuverability, and performance |
| Best Reverse Kit | Eagleking Electric Reverse Kit (2014–2025 Touring) |
| Material | 4140 chromoly steel, hardened to 58-60 HRC |
| Torque Capacity | 650 Nm |
| Compatibility | Road Glide, Street Glide, Ultra Limited |
| Common Errors | Bad wiring, poor alignment, skipped torque specs |
Upgrading your Harley Touring motorcycle’s reverse gear is not just about convenience — it’s about performance, safety, and riding confidence. With the right tools, attention to detail, and a premium kit like the Eagleking electric reverse system, your ride will be smoother than ever before.